Appearance
Extension Settings
Settings allow models to configure your extension before or during a broadcast. Only models can see and edit settings — viewers do not have access to the settings UI.
The settings form is rendered from the settings.html file declared in views.settings in your manifest. The platform displays this page inside a modal when the model opens extension settings from the extension card.
How It Works
- The model opens your extension settings from the extension card.
- The platform loads
settings.htmlinside a modal. The Save and Cancel buttons are rendered by Stripchat outside of your iframe — do not add your own save/cancel buttons insettings.html. - Your code calls
v1.model.ext.settings.getto load previously saved settings and populate the form. - The model fills in the form and clicks Save.
- The platform emits a
v1.model.ext.settings.set.requestedevent to your settings iframe. - Your code validates the form and calls
v1.model.ext.settings.setwith the settings object and anisErrorflag. - If
isErrorisfalse, the platform saves the settings and closes the modal. Iftrue, the modal stays open so the model can fix validation errors.
Manifest Setup
Add views.settings to your manifest pointing to the settings HTML file:
json
{
  "version": "v2.0",
  "views": {
    "settings": "settings.html",
    "slots": ["EXTENSION_SLOT_MAIN_GAME_FUN", "EXTENSION_SLOT_RIGHT_OVERLAY", "EXTENSION_SLOT_BACKGROUND"],
    "pages": {
      "menu": "menu.html",
      "overlay": "overlay.html",
      "background": "background.html"
    },
    "resolveSlotPageScript": "resolveSlotPage.js"
  }
}
Loading Settings
On mount, load the current settings to populate the form:
ts
import { createExtHelper } from '@stripchatdev/ext-helper';

const ext = createExtHelper();

const res = await ext.makeRequest('v1.model.ext.settings.get', null);
const settings = res.settings;
// populate your form with `settings`
Saving Settings
Subscribe to the v1.model.ext.settings.set.requested event. The platform fires this event when the model clicks Save. In the handler, validate your form and call v1.model.ext.settings.set:
ts
ext.subscribe('v1.model.ext.settings.set.requested', async () => {
  // gather your form state and validate it using your own logic
  const settings = { /* your settings object */ };
  const isError = false; // set to true if validation failed

  await ext.makeRequest('v1.model.ext.settings.set', {
    settings,
    isError,
  });
});settings— any JSON-serializable value. The shape is entirely up to you.isError— set totrueif validation failed. The platform will keep the modal open so the model can fix the errors.
Reading Settings from Other Slots
Any slot can read the current extension settings at runtime:
ts
const res = await ext.makeRequest('v1.ext.settings.get', null);
const settings = res.settings;
Settings are also passed as the third argument to the resolver script, so you can use them to conditionally enable or disable slots.
Full Example
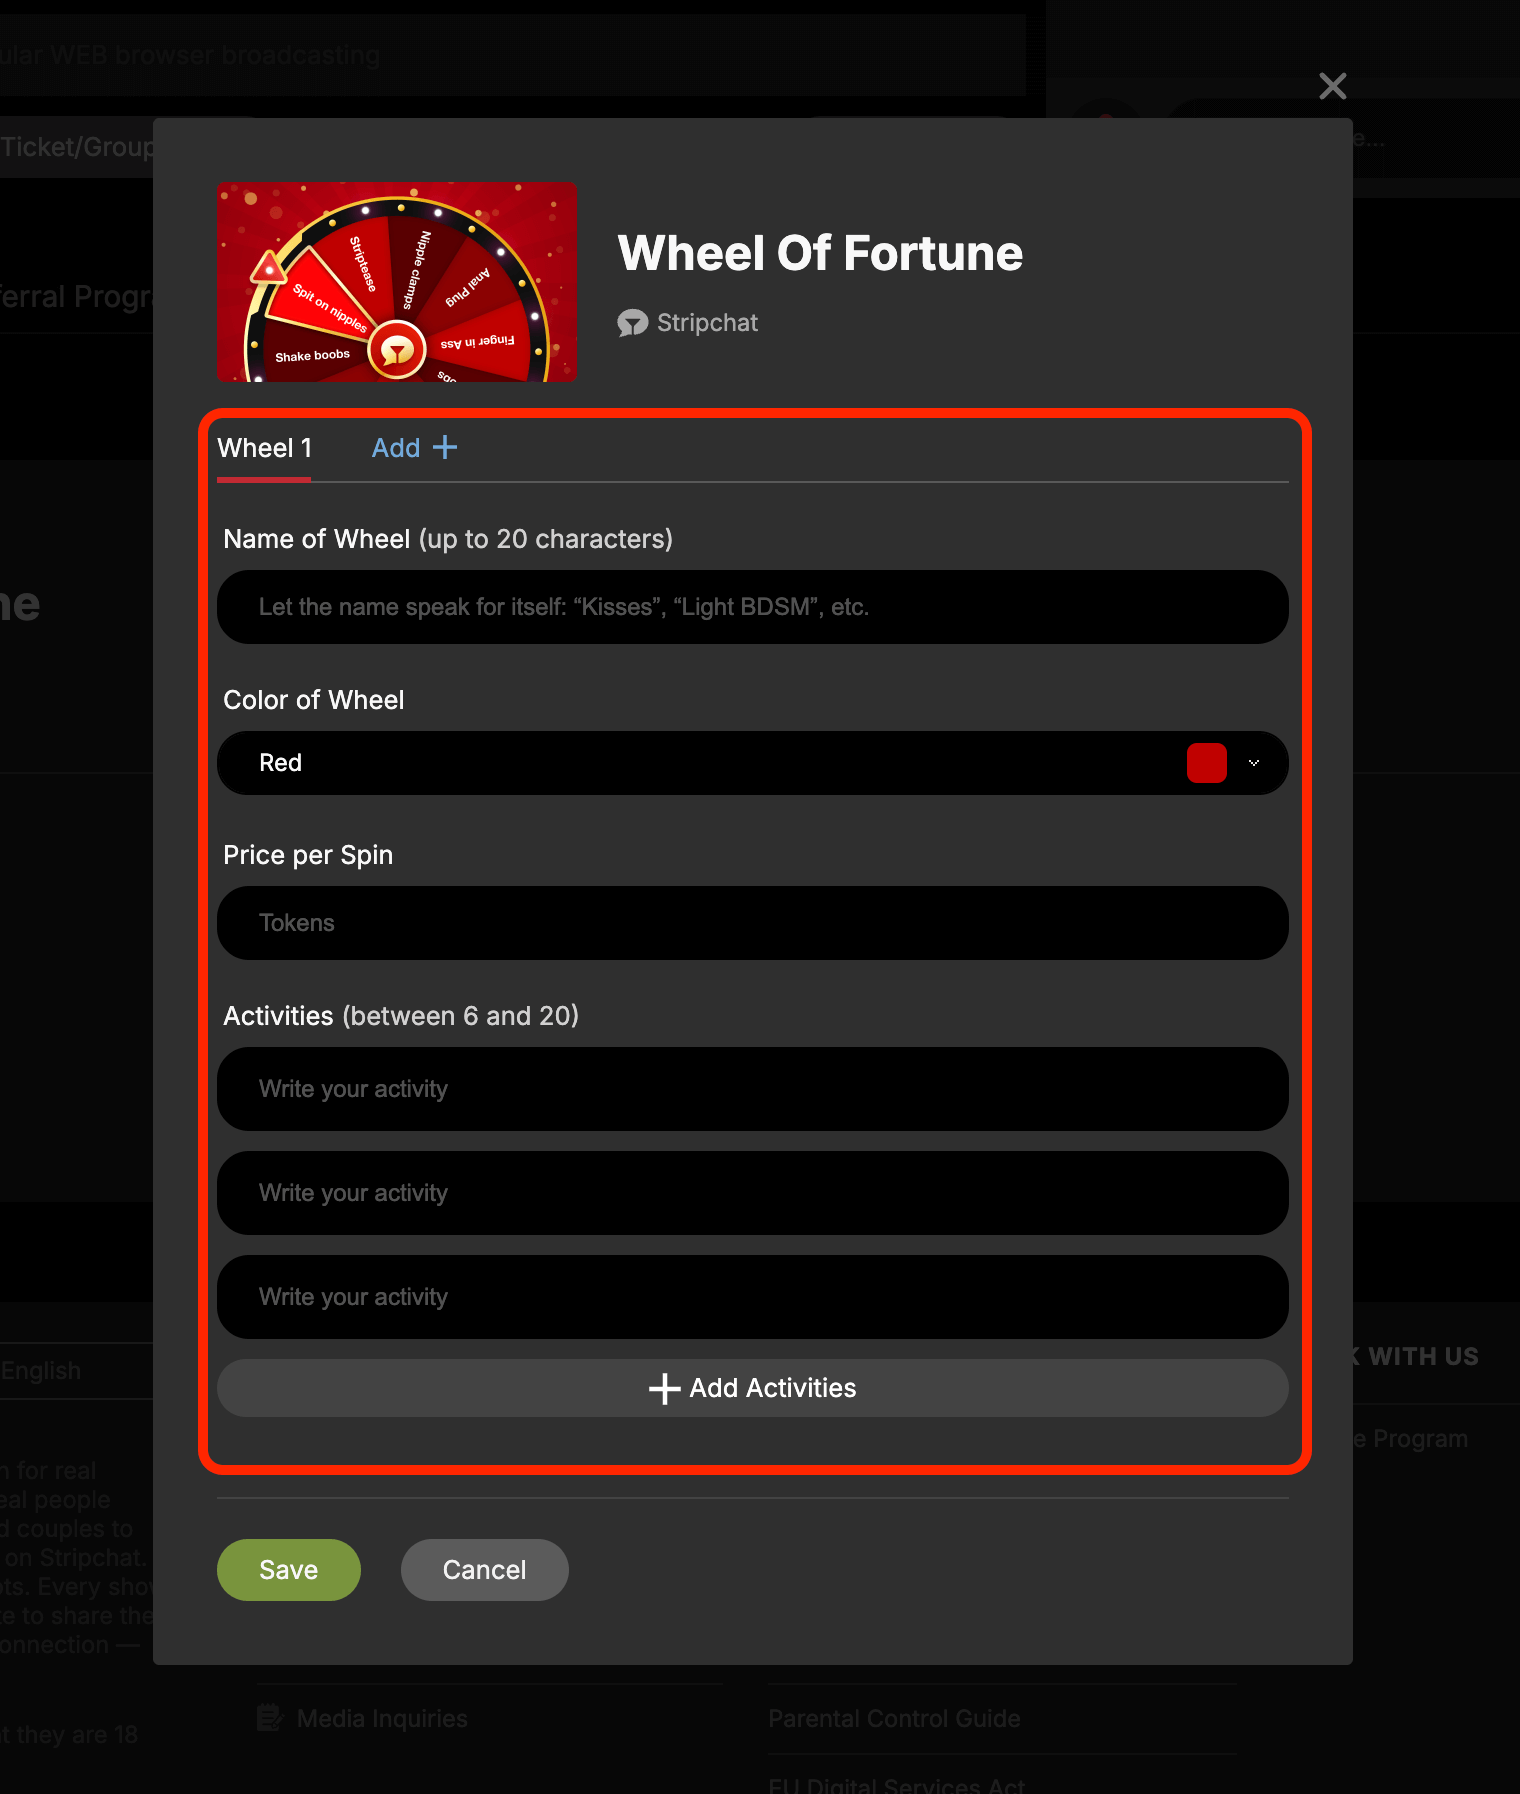
Here is a simplified settings form based on Wheel of Fortune — an official Stripchat extension:
ts
import { createExtHelper } from '@stripchatdev/ext-helper';

const ext = createExtHelper();

// Load saved settings on mount
const res = await ext.makeRequest('v1.model.ext.settings.get', null);
const savedSettings = res.settings;

// populate your form with savedSettings ...

// Save settings when the model clicks "Save"
ext.subscribe('v1.model.ext.settings.set.requested', async () => {
  // gather your form state
  const settings = { /* ... */ };

  // run your own validation
  const isError = false;

  await ext.makeRequest('v1.model.ext.settings.set', {
    settings,
    isError,
  });
});
TIP
Keep validation in your settings iframe. The platform only knows whether saving succeeded or failed via the isError flag — it does not validate the settings object itself.